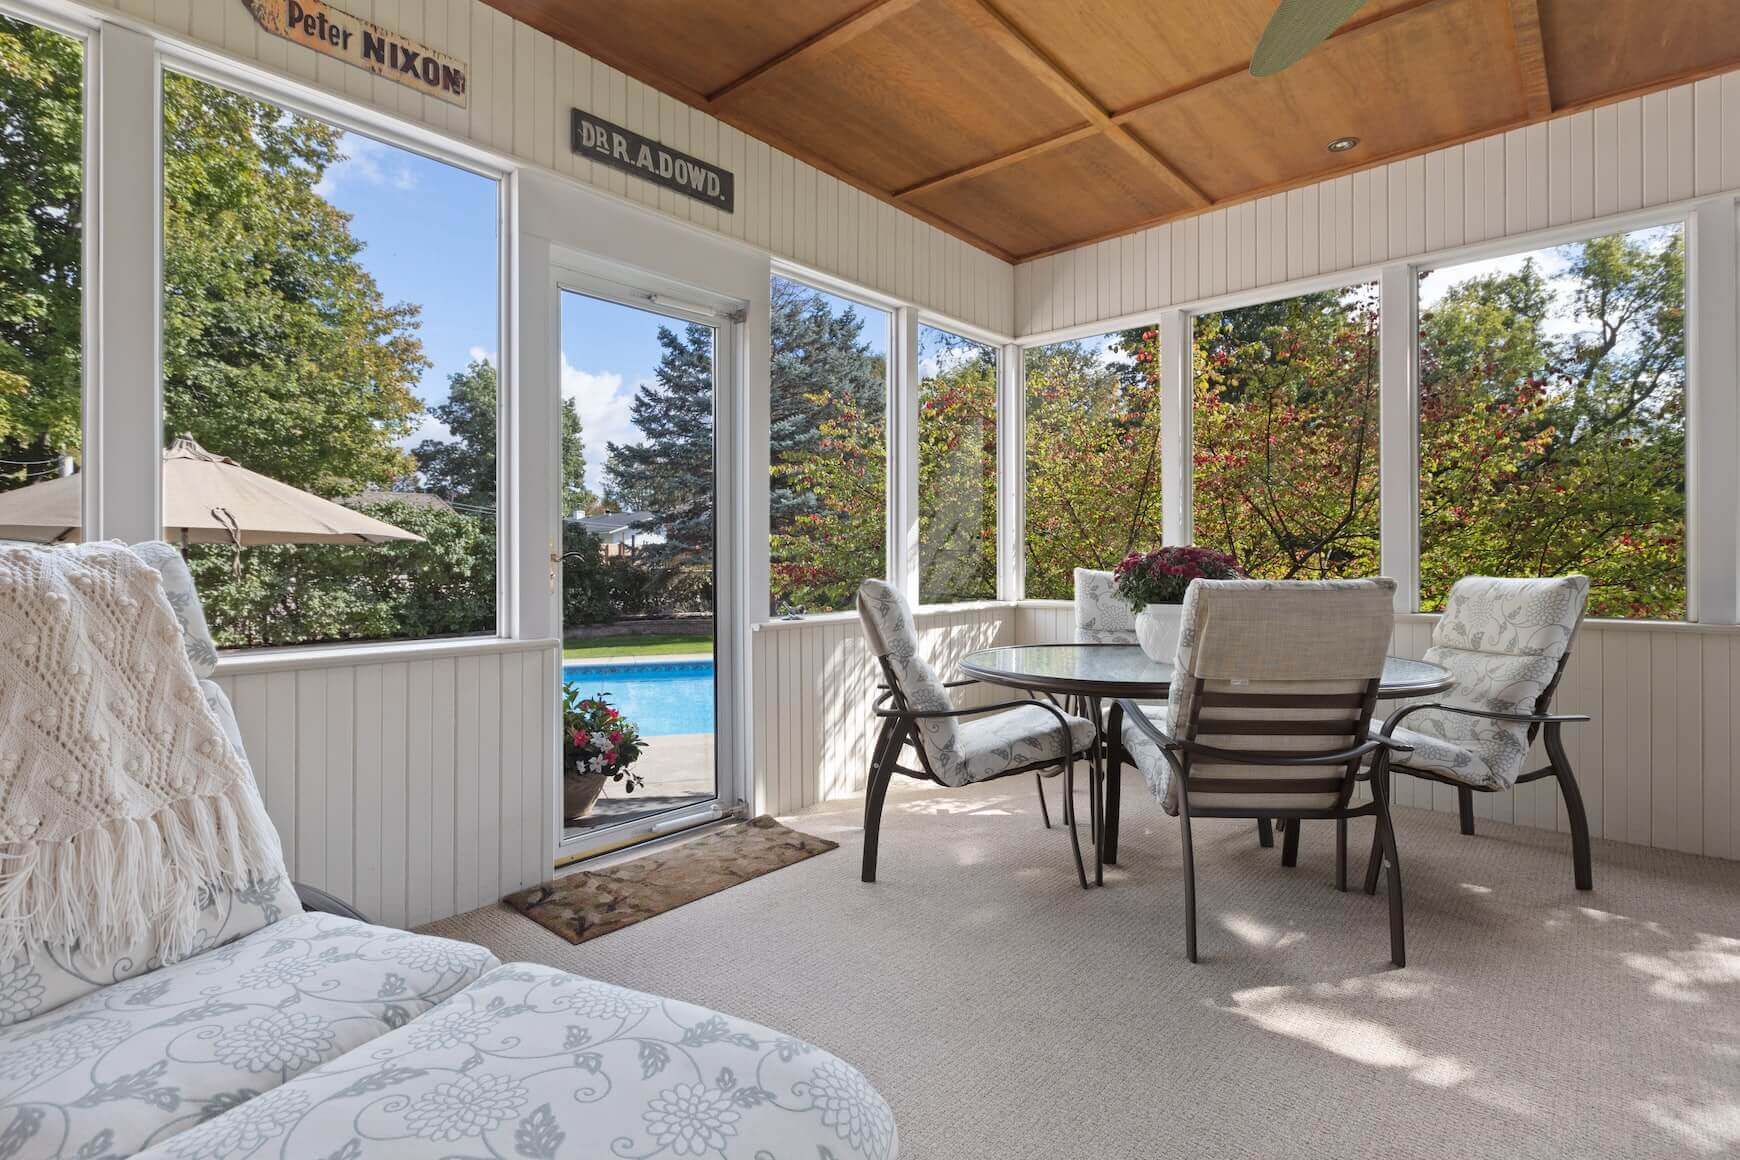
If you’ve been living in your house for several years now, chances are your garage/shed has seen some wear and tear. Considering the intended purpose of these spaces, this much can be expected. However, with the property market being what it is, it can be a good idea to repurpose these areas into extended living spaces and add value to your home.
Some popular alternative uses for garages and sheds include:
– Man cave
– Gym
– Studio
– Office
– Playroom
– Granny flat
One thing to remember, however, is that the original structure of a garage/shed was not designed for comfort. In the high seasons of summer and winter, a garage or shed, can quickly become incredibly uncomfortable. This is because almost all garages/sheds are not insulated and so the space can be unbearably hot in the summer and uncomfortably cold in the winter.
It is possible, and in fact can be pretty easy, to insulate your garage or shed and transform it into a comfortable living space. In this article, we’ll explore how you can insulate your garage or shed using Ceilink.
The Benefits of Insulating your Shed or Garage with Ceilink
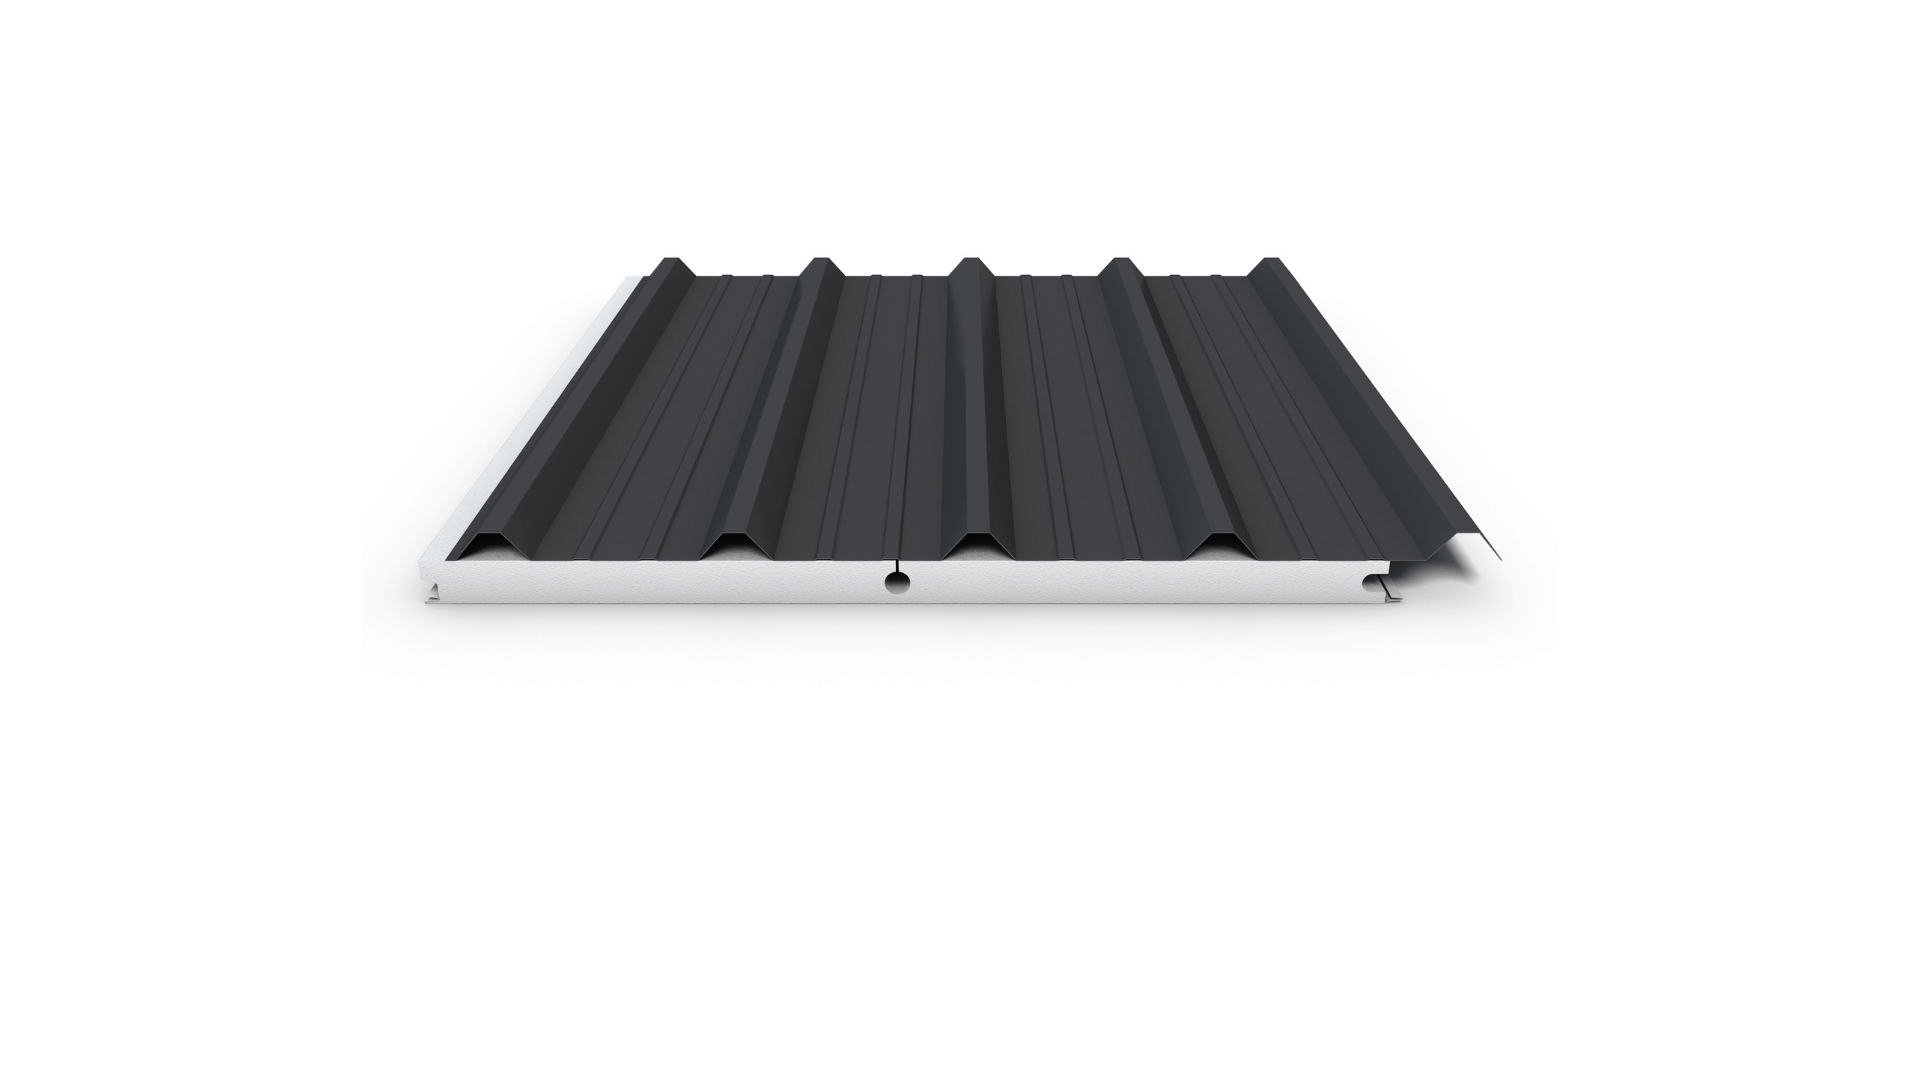
Ceilink panels offer a quick and easy way to insulate your space without having to knock down and rebuild. These panels consist of sandwiched materials that work to keep the area at a comfortable temperature.
Thermal Insulation
Ceilink panels are made of three sandwiched materials – a steel face, an EPS core and a foil backing. The fire-retardant EPS insulated core dramatically reduces radiant heat transfer, mould and condensation. This means that these panels are the perfect lightweight solution for regulating temperature in your garage or shed.
Money Saving
An obvious benefit of insulating your garage/shed with Ceilink is being able to eliminate the need for heating and cooling appliances. Being able to regulate the temperature of your space ensures a level of thermal comfort without accumulating expensive energy bills.
Simple DIY Installation
Probably the most appealing benefit of Ceilink panels is their easy installation. The panels fit on top of a simple framework that is secured to your existing roof structure. Unlike your traditional battening method, which can take upwards of 3 days, a Ceilink project can be completed in a
matter of hours.
Ceilink Shed DIY Install
The process of installing Ceilink panels is quick and easy; to start, you’ll need to prepare the outer framework. Begin by fastening the supports to the appropriate areas around your existing roof structure, making sure to leave a gap of 60mm from the top.
Pro Tip: Make sure to leave your final angle until all but one panel has been fitted to allow for the last panel to fit above framework first.
It’s important to ensure that your panels are the correct size for your space before fitting them. If needed, the panels can be trimmed using a circular saw. When cutting, make sure that the reflective silver side is facing upward, and the white steel surface is resting on something soft to
avoid scratching the ceiling finish.
The length of your panels should be 45mm shorter than the internal measurement of the structure and the width of your outer panels will depend on the size of your structure. To ensure you have a symmetrical finish, we recommend trimming your outer panels, making sure to keep the male joint on the first panel and the female joint on the last panel.
When fitting the panels, lift them above the wall angles/supports, and then gently lower the panel so that it sits evenly on top of each edge. Once in, slide that same panel to the furthest point of your roof and secure it in place with your screws. Repeat this process with each of the following panels, securing them to the frame as you go.
As instructed, your final angle should still need fixing. Start by placing the angle on the wall and drilling your fixing points but do not secure the angle in place just yet. Tilt your panel into place above the support and then lift the outer edge to access your fixing points and secure your last
angle. Once you have fixed your angle, gently lower your final panel, and secure it in place.
For further insulation, you can also install Ceilink panels to the walls of your garage or shed, as the process is very similar. Most people find that insulating their roof provides the desired level of comfort but, for rural areas with extreme weather, this can be a helpful addition.
Conclusion
With Ceilink panels, you can achieve thermal comfort without sacrificing on style. With its easy installation, you can transform your garage or shed into a comfortable and beautifully finished space for all lifestyles and activities.
Versiclad Insulated panels are made right here in Sydney. For more information, download our brochure or complete the below form to be put in contact with a Versiclad Preferred Installer.